
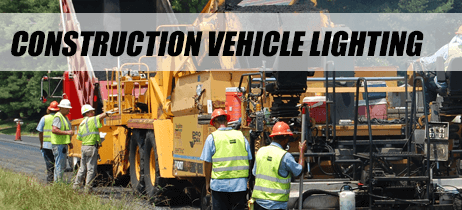
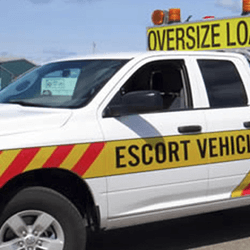
Construction Vehicle Lighting


Construction vehicle warning lights need to be unmistakable in dust, glare, rain, and fast traffic. This page helps you build construction truck strobe light kits by product type so you can create front, side, and rear coverage without guessing on mounts or fitment. Use it to plan a complete setup for pickups, dump trucks, and service bodies working roadways, shoulders, and active job sites. Serving first responders and professionals since 2005.
Shop Construction Lighting by Product Type
Use these categories to build a complete construction warning package.


Related Lighting Categories
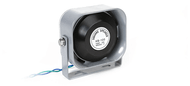
LED strobe lights
LED warning lights for work trucks
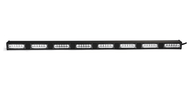
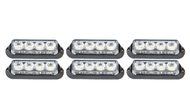
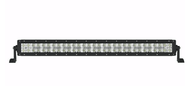
All LED light bars
Shop By HEAVY DUTY VEHICLE TYPE
Start Here
If you are building a construction truck strobe light kit, start with a primary warning layer first, then add rear protection and perimeter fill based on where the truck works.
Step 1: Choose your primary warning layer (roof or forward interior)
Step 2: Add front corner and rear corner coverage for angles and intersections
Step 3: Add a traffic advisor if you control merges, tapers, or lane shifts
What Each Category Is Best For
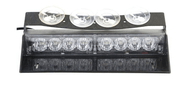
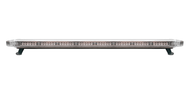
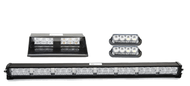
Full Size Light Bars: Maximum roofline visibility for high exposure roadway work and fleet standard builds.
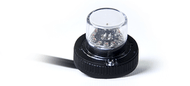
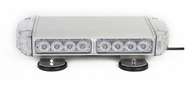
Mini Light Bars: Compact roof warning when clearance, removable setups, or smaller platforms matter.
Visor Light Bars: Strong forward warning without a roof mount when racks and equipment limit roof options.
Dash/Deck Lights: Fast interior warning for pickups and crew trucks when you want minimal exterior work.
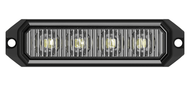
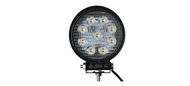
Grille and Surface Mount Lights: Low profile exterior coverage for front corners, rear corners, and side fill.
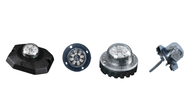
Hideaway Lights: Clean installs in headlight or tail light housings when you want hidden hardware when off.
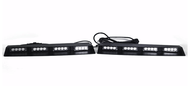
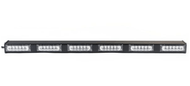
Interior/Exterior Light Bars: Flexible bar formats for rear windows, tool bodies, bumpers, and exterior zones.
Traffic Advisors: Rear directional signaling for merges, lane control, and backing zone protection.
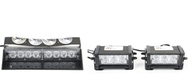
Surface Mount Multi Packs: Matched sets for fast perimeter builds with consistent output and synchronization.
Hideaway Strobe Light Multi Packs: Matched hideaway kits for consistent front and rear concealment builds.
What Are Construction Vehicle Warning Lights?
Construction vehicle warning lights are high visibility strobes, light bars, and directional signals used on work trucks to alert traffic around road work, lane control, backing zones, and active job sites. A complete construction lighting setup is built around coverage and mounting zones, not a single product type.
Construction vehicle lighting requirements
Construction Best Sellers
Most construction teams start with a primary warning layer, then add rear protection and side fill based on where the truck works and how it is mounted.
Quick Setup Finder
Goal: Roadway work zone visibility on a pickup or crew cab
Best Products: A primary roof or interior warning layer plus front corner and rear corner coverage
Best Mount Zones: Roofline or visor/dash, grille corners, rear corners, rear upper zone
Goal: Dump truck backing and taper protection
Best Products: Rear directional signaling plus rear corner warning and side fill
Best Mount Zones: Rear upper zone, rear corners, bed side zones, front corners
Goal: Service body or construction work truck with limited roof real estate
Best Products: Forward interior warning plus exterior perimeter strobes for 360 degree coverage
Best Mount Zones: Windshield/visor area, grille corners, body sides, rear corners
Goal: Fleet standardization across mixed vehicles
Best Products: Repeatable product families and matched multi-packs to keep brightness and behavior consistent
Best Mount Zones: Standardized front corners, standardized rear corners, standardized roof or rear upper zone
Goal: Clean, low-visibility hardware when not activated
Best Products: Hidden-style installs paired with low profile exterior fill where needed
Best Mount Zones: Headlight/taillight housings, grille corners, rear corners
Common Construction Vehicles We See
Pickup trucks and crew cabs used for roadway and jobsite work
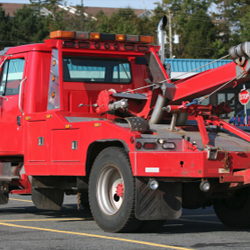
Dump trucks and tri axle trucks
Flatbeds and stake beds
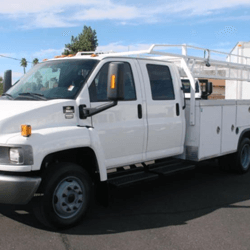
Service bodies and tool body trucks
Concrete and materials delivery trucks
Work trucks with ladder racks and headache racks
Common construction truck platforms
Ford F-150 and Ford Super Duty work trucks
Chevy Silverado and GMC Sierra (including HD platforms)
Ram 1500, Ram 2500, and Ram 3500 work trucks
This page is a build guide. Confirm mount space, cab layout, and safe routing on the product listing and install notes.
Technical Fitment and Installation Notes
Mount above the grime line when possible because road film and dust reduce effective output fast.
Plan wiring slack on dump beds and tilt bodies to avoid pinch points during articulation.
Avoid blocking cameras and driver assist sensors and keep warning lights out of sensor sightlines.
Use grommets, loom, and sealed routing through firewalls and body panels to reduce corrosion failures.
If you run multiple heads, consider synchronization so the pattern reads clearly instead of blending into visual noise.
What Construction Vehicles Need From Warning Lights
The operational environment
Construction trucks operate in glare, dust, rain, and mixed speed traffic where visibility changes quickly. The goal is not just more light, it is coverage that stays readable at distance, at angles, and during backing and lane control. Mounting zones also change when racks, toolboxes, and job equipment take up roofline space.
The failure modes
The most common failures are low mounts that get muted by spray and grime, inconsistent brightness across mixed products, and wiring that rubs or pinches over time. Another common issue is forward only warning with weak rear protection, which is where many roadside incidents happen.
Fitment zero drift note
Pick product types by mounting zones first, then match output and control features to your work conditions.
Recommended Lighting Setups
Preset 1: Pickup Road Crew Starter Kit
Who it’s for: Contractors and road crews running pickups and crew cabs in mixed traffic.
Product types included: Primary roof or interior warning, plus front corner and rear corner fill.
Mounting zones: Roofline or dash/visor, grille corners, rear corners.
Color guidance: Amber or amber/white are commonly chosen for work zone signaling. Verify local requirements.
Why it works: Strong forward recognition plus perimeter fill reduces blind angles at intersections and during backing.
Shop Grille and Surface Mount Lights
Preset 2: Dump Truck Rear Protection Package
Who it’s for: Dump trucks working tapers, backing zones, and shoulder operations.
Product types included: Rear directional signaling plus rear corner warning and side coverage.
Mounting zones: Rear upper zone, rear corners, bed side zones.
Color guidance: Choose permitted colors and patterns based on where the truck operates. Verify local requirements.
Why it works: Rear directional signaling manages approaching traffic while corner coverage protects during backing and loading.
Shop Traffic Advisors
Preset 3: Service Body 360 Degree Coverage Build
Who it’s for: Service bodies and tool trucks with limited roof space and frequent stops.
Product types included: Forward interior warning plus low profile exterior perimeter strobes for full angle coverage.
Mounting zones: Windshield/visor area, grille corners, body sides, rear corners.
Color guidance: Use colors commonly selected for caution and work activity where allowed. Verify local requirements.
Why it works: You get strong forward presence without relying on a single roof solution, plus perimeter coverage around the truck.
Shop Dash/Deck Lights
Preset 4: Fleet Standard Multi Pack Kit
Who it’s for: Fleet managers standardizing installs across multiple trucks and platforms.
Product types included: Matched multi packs plus a primary warning layer and optional rear direction.
Mounting zones: Standardized front corners, standardized rear corners, roofline or rear upper zone.
Color guidance: Standardize colors and patterns only after confirming local and customer requirements. Verify local requirements.
Why it works: Multi packs reduce mismatch and speed installs while keeping the warning signature consistent fleetwide.
Shop Surface Mount Multi Packs
Quick Comparison: Magnetic Roof Option vs Permanent Roof Option
| Field | Magnetic Roof Option | Permanent Roof Option |
|---|---|---|
| Best for | Rotating vehicles and temporary needs | Fleet standard installs and daily exposure |
| Install effort | Low | Medium to high |
| Durability | Moderate | High |
| Price point | Mid | Mid to premium |
Best Product Types for Construction
Full Size Light Bars
Best for: Maximum roofline presence where the truck lives in high exposure traffic.
Tradeoffs: More permanent mounting and more planning for routing and sealing.
What to check before buying: Mount footprint, cable routing path, and clearance with racks and equipment.
Mini Light Bars
Best for: Smaller trucks or lower profile builds where you still need roof presence.
Tradeoffs: Smaller footprint can mean less coverage than full size options.
What to check before buying: Mount method, roof curvature fit, and whether you need quick removal.
Visor Light Bars
Best for: Strong forward warning when roof mounting is limited by racks or equipment.
Tradeoffs: Forward focused coverage means you may still need rear and side fill.
What to check before buying: Vehicle visor shape, windshield angle, and glare control at night.
Dash/Deck Lights
Best for: Quick installs on pickups and crew trucks with minimal exterior work.
Tradeoffs: Interior placement can reduce side visibility and can create reflections if placed poorly.
What to check before buying: Mount style, power method, and whether your windshield angle affects visibility.
Grille and Surface Mount Lights
Best for: Corner punch and perimeter fill for angle coverage.
Tradeoffs: Low mounts can get muted by road film and debris if placed too close to the grime line.
What to check before buying: Mount depth, lens direction, and clearance behind grille or panels.
Hideaway Lights
Best for: Clean installs where hardware stays hidden when off.
Tradeoffs: Requires drilling and careful sealing to prevent moisture issues.
What to check before buying: Housing compatibility, heat considerations, and correct sealing approach.
Interior/Exterior Light Bars
Best for: Rear windows, tool bodies, bumpers, and exterior zones where you want bar style spread.
Tradeoffs: Placement choices heavily affect glare and angle coverage.
What to check before buying: Mount surface rigidity, line of sight, and cable routing protection.
Traffic Advisors
Best for: Directional signaling in merges, tapers, lane changes, and backing protection.
Tradeoffs: Not a substitute for full perimeter warning, it is a control layer.
What to check before buying: Rear mount zone, controller needs, and sightline from approaching traffic.
Surface Mount Multi Packs
Best for: Fast matched builds with consistent output across multiple mounting points.
Tradeoffs: Still requires smart placement to avoid low mount grime losses.
What to check before buying: Number of heads needed, mount locations, and synchronization features.
Hideaway Strobe Light Multi Packs
Best for: Matched hidden installs front and rear for clean builds.
Tradeoffs: More install effort and sealing diligence.
What to check before buying: Headlight and taillight housing fit, drilling plan, and weather sealing.
Mounting and Installation
No drill vs permanent mounts
No drill options can reduce downtime, but permanent installs typically hold up better under vibration, washing, and daily exposure. Choose based on how often the vehicle is reassigned and how harsh the work environment is.
Wire routing safety
Route power through grommets and loom, keep runs away from moving bed mechanisms, and protect any pass through points with strain relief. If the vehicle has a dump bed or tilt mechanism, plan slack and anchoring so the harness never becomes the limiting factor.
Power and compatibility
Most work trucks are 12V, but amperage draw and wiring requirements vary by product. Verify amperage and connection style on the individual product pages.
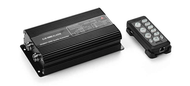
Control and synchronization
If you run multiple warning points, synchronization can improve readability and reduce the random flash effect. Keep the control plan simple enough that drivers use it correctly every time.
Common install mistakes
Mounting too low where dust and spray mute output.
Only running forward warning and leaving the rear work zone under protected.
Routing wires through sharp edges without grommets or wire loom.
Creating windshield or hood glare with poor interior placement.
Mixing unmatched heads that look inconsistent in brightness or pattern.
Color and Flash Pattern Guidance
Many construction fleets choose colors and patterns that emphasize caution and work activity, but permitted colors vary by location and policy. Regulations vary; verify local and agency requirements.
Helpful starting points
Amber LED Strobe Lights
Amber and White LED Strobe Lights
State statutes reference
Compliance, Visibility, and Professional Standards
Many professional warning lights list testing to standards such as SAE J595, J845, J578, and J575, but exact certifications vary by product and configuration. See individual product listings for exact certifications and specs. Practical visibility comes from coverage, correct mounting height, and clear front, side, and rear presence that stays readable in day and night conditions. This is a general guide, not legal advice.
Heavy Duty Commercial Vehicle Warning Lights
Why Choose Extreme Tactical Dynamics
Serving first responders and professionals since 2005. We help construction teams choose the right product types for the vehicle, mounting zones, and work conditions so you get usable coverage instead of random lights.
Free Shipping on orders $88+
5 Year Limited Warranty on LEDs
25,000+ Reviews from first responders and fleet managers
Government Approved Vendor
Shipping
Warranty
Returns
Contact Support
Frequently Asked Questions
What are the best construction lights for trucks when I want a complete kit, not just one light?
Start with a primary warning layer, then add front and rear corner coverage to create a complete, readable kit. A roof or forward interior solution gives you distance recognition, while corners protect angles and intersections. If you manage merges or tapers, add directional signaling as a separate layer. This approach prevents the common mistake of overbuilding one area and underprotecting the rear.
What is the best construction truck strobe light kit for roadway work zones with fast traffic?
Use a strong primary warning layer and pair it with rear corner coverage, then add a traffic advisor if you control lane shifts. Roadway work is about readability from distance and from multiple angles, not just peak brightness. Prioritize mounting positions that stay visible above road film and spray. Keep the control plan simple so drivers use the right mode every time.
If I have a Ford F-150 work truck, what construction warning lights should I start with first?
Start with a primary warning layer that fits your mounting constraints, then add grille corner and rear corner fill. Many F-150 work builds need to account for toolboxes, racks, and windshield glare. Corner coverage improves side angles and intersection visibility. Verify routing paths and avoid blocking cameras or sensors.
If I run a Chevy Silverado or Ram for construction, do I need a roof light bar to be seen?
You do not always need a roof light bar, but you do need a strong primary warning layer and perimeter coverage. A visor or dash solution can work when roof space is limited by racks or equipment. Add exterior corner strobes to keep visibility at angles and during turns. Choose mounts that stay above the grime line when possible.
What is better for construction trucks, magnetic roof warning lights or permanent mounts?
Magnetic options are best for temporary use or rotating vehicles, while permanent mounts hold up better for daily exposure and fleets. Permanent installs typically handle vibration, weather, and washing more consistently. Magnetic setups are convenient but should be evaluated for long term durability and routing safety. Pick based on how often the vehicle assignment changes.
Where should I mount construction warning lights so they are visible in dust, rain, and road spray?
Mount your primary warning layer in a high, clear zone and use corners for angle coverage, then avoid placing key lights too low. Low mounts often get muted quickly by road film and spray. Rear visibility matters on roadway jobs, so do not build a forward only setup. Use protected routing and strain relief so the wiring survives the environment.
Do I need a traffic advisor for construction work, or are strobes enough?
Strobes warn, but traffic advisors direct, so you need both if you manage tapers, merges, or lane shifts. Directional signaling reduces confusion when drivers must move around your truck. If your work is mostly jobsite only, a traffic advisor may be optional. If you operate on shoulders or in lanes, it is often a high impact upgrade.
How many strobe heads do I need on a construction truck to get real 360 degree coverage?
Start by covering front corners and rear corners, then add side fill only where blind angles remain. Corner coverage does most of the work for intersection visibility and turning zones. The right number depends on mounting constraints and whether you have a roof or interior primary layer. A matched multi pack can simplify planning and keep output consistent.
What is the best setup for a dump truck strobe light kit when backing is the main risk?
Prioritize rear corner warning and consider directional signaling for approaching traffic, then add side coverage if the truck turns across lanes. Dump beds move, so routing must include slack and protected paths to prevent pinching. Rear visibility is often the highest value layer for dump work. Keep key warning points high enough to stay visible above grime and spray.
Do dash lights create glare at night on work trucks, and how do I avoid it?
Dash lights can create glare if positioned poorly, but they work well when mounted and aimed correctly. Avoid placements that reflect strongly off the windshield or hood. Consider visor based solutions if glare is hard to control. Always test at night before finalizing wiring and placement.
Are hideaway strobes a good choice for construction vehicles that want a clean look when off?
Hideaways can be a great option when you want hardware hidden, but they require careful drilling and sealing. Housing fit and sealing quality matter as much as the light itself. Plan placements to avoid unwanted hot spots from OEM reflector geometry. If you want simplicity, surface mounts are often faster and easier to service.
Can I mix different warning light brands or types and still look professional and consistent?
You can, but matched product families or multi packs usually look more consistent in brightness and flash behavior. Mixed products often create uneven intensity and a less readable warning signature. Consistency matters for fleet standardization and driver recognition. Standardize mounting zones first, then standardize product families second.
How do I avoid wiring failures on construction trucks with vibration, mud, and frequent washing?
Use grommets, loom, sealed routing, and strain relief, and keep harnesses away from moving mechanisms. Dump beds and tilt bodies require slack planning to prevent pinch points. Protect pass-through points and avoid sharp edges without grommets. A clean routing plan prevents downtime more than any single product feature.
Should I choose amber or amber/white for construction truck warning lights?
Amber and amber/white are commonly selected for work zone signaling, but requirements vary by location and policy. Choose the color based on permitted use, job duties, and whether you need maximum daytime contrast. Keep the warning signature consistent across the truck whenever possible. Regulations vary, so verify local and agency requirements.
Are construction vehicle warning lights legal everywhere, and what should I verify before using them on public roads?
Rules vary by state and policy, so verify permitted colors, placement, and usage rules before operating on public roads. Some jurisdictions restrict certain colors or require specific conditions for use. Confirm how your fleet or contractor policy defines authorized warning equipment. Use the statutes reference to start your review, then follow local guidance.